
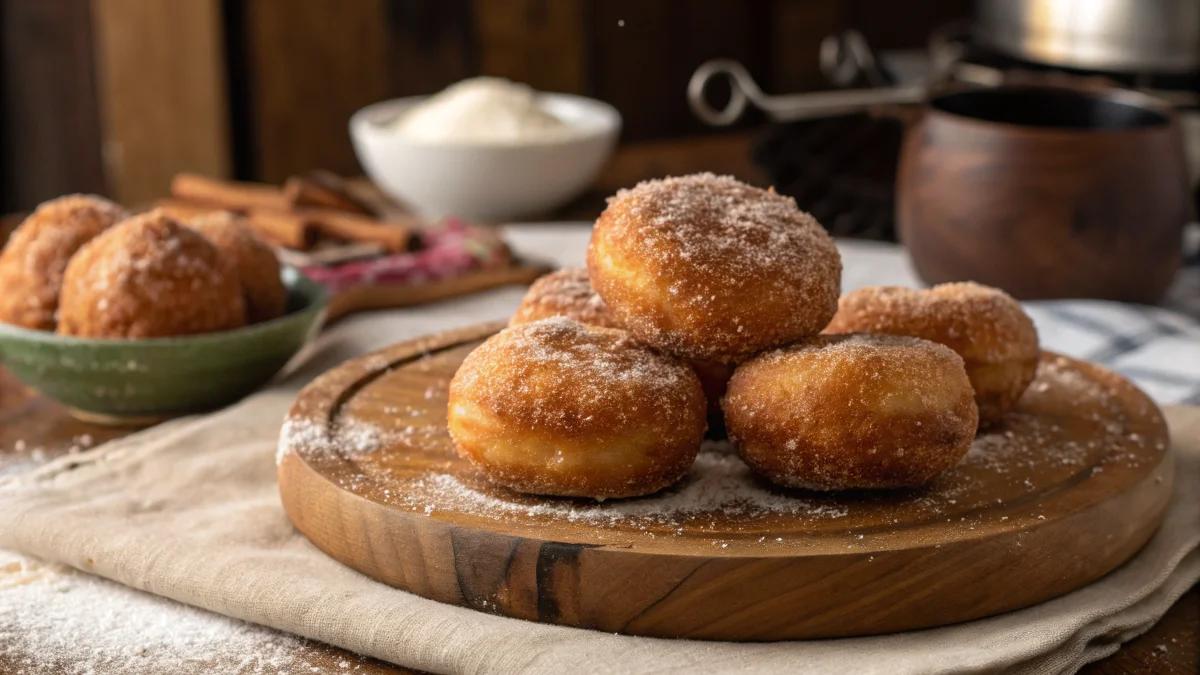
Ah, Malasadas!
Just hearing the name brings thoughts of comfort and sweetness. These golden, pillowy, sugar-dusted treats aren’t like your usual doughnuts. Instead, they’re crispy on the outside, soft and fluffy on the inside, and perfectly sweet to brighten any day.
In this guide, you’ll learn everything you need to know to make pillowy, sugar-dusted malasadas right at home. First, we’ll explore their rich Portuguese roots, which give them their unique charm. Then, we’ll share simple tips for preparing the dough so you can create bakery-quality treats in no time. So, grab your apron—it’s time to get started!
Why You’ll Love Making Malasadas
When you’re learning how to make pillowy, sugar-dusted malasadas , understanding their history and a few helpful tips can make all the difference. For instance, these treats are more than just dessert—they’re a fun way to bake and add a little sweetness to your day. Additionally, whether you stick to the classic recipe or try creative variations, you’ll quickly fall in love with the endless possibilities of homemade malasadas.
If you’re craving even more delicious baked goods, be sure to check out our Easy Donut Recipes or dive into our guide on Portuguese Desserts You’ll Love . These resources will inspire you to keep baking and experimenting in the kitchen!
Part 1: What Are Malasadas?
A Bite-Sized History of Malasadas
You might be wondering, what exactly are malasadas? Think of them as Portugal’s gift to the dessert world—a cross between a donut and a churro but oh-so-much better. Originating in the Azores, these fried dough balls made their way to Hawaii thanks to Portuguese immigrants back in the late 1800s. Fast forward to today, and they’ve become a staple at luaus, farmers’ markets, and even roadside stands across the islands.
Fun fact: In Hawaii, February 1st is officially known as “Malasada Day” because it falls before Lent, when many folks indulge in sweets before giving up indulgences. Talk about a tradition worth celebrating!
Why Everyone Loves These Sugary Treats
Let’s face it—there’s something magical about biting into a warm, freshly fried malasada. The outside is slightly crisp, while the inside is impossibly light and airy. And then comes the pièce de resistance: that generous dusting of sugar coating every nook and cranny. Honestly, who could resist?
Plus, unlike regular donuts, malasadas skip the hole, which means more room for all that pillowy goodness. Whether you’re enjoying them plain or stuffed with custard or guava jam, these little beauties are guaranteed to bring joy to any occasion.
Stay tuned, because next, we’ll dive into the ingredients you’ll need to recreate how to make pillowy, sugar-dusted malasadas right in your own kitchen!
Part 2: Ingredients You’ll Need for Perfect Malasadas
Essential Ingredients for That Pillowy Texture
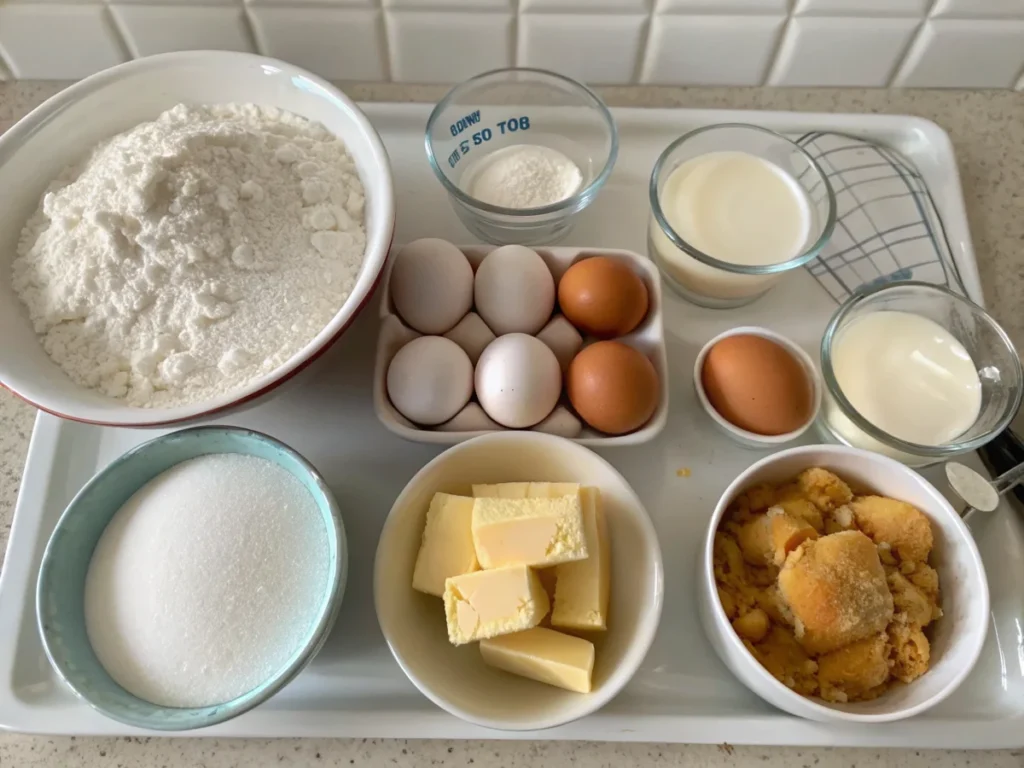
Alright, folks, let’s talk ingredients—the backbone of any great recipe. To nail how to make pillowy, sugar-dusted malasadas , you’ll need a few key players in your pantry. First up is yeast . Yep, that little packet of magic is what gives these babies their signature fluffy texture. Make sure it’s fresh; otherwise, your dough might end up as flat as a pancake.
Next, you’ll need flour —all-purpose works like a charm here. Combine it with a bit of sugar, salt, eggs, milk, and butter, and you’ve got yourself the foundation of perfection. Oh, and don’t forget the pinch of nutmeg. It’s not mandatory, but trust me, it adds a subtle warmth that takes these malasadas to the next level.
Now, here’s the deal: the secret to achieving that melt-in-your-mouth softness lies in letting the dough rise properly. Patience is key, my friends. Rush this step, and you’ll miss out on all the airy goodness.
Substitutions and Swaps for Dietary Needs
What if you’re cutting back on dairy or avoiding gluten? No worries—we’ve got you covered. For a dairy-free version, swap regular milk with almond or oat milk, and use vegan butter instead of the traditional kind. Easy peasy !
And hey, if you’re gluten-free, there are plenty of GF flour blends out there designed specifically for baking. Just keep in mind that gluten-free dough can be a tad trickier to work with, so handle it gently.
One last pro tip: if you’re feeling adventurous, try adding a splash of vanilla extract or citrus zest to the dough. These little tweaks won’t overpower the flavor but will give your malasadas a unique twist.
With these ingredients ready to go, you’re well on your way to mastering how to make pillowy, sugar-dusted malasadas . Up next, we’ll walk you through the actual process of bringing this dreamy dough to life. Spoiler alert: it’s easier than you think!
Part 3: Step-by-Step Guide to Making Malasadas
Prepping the Dough Like a Pro
Alright, time to roll up those sleeves and get messy! The first step in how to make pillowy, sugar-dusted malasadas is prepping the dough. Start by activating your yeast. Mix it with warm milk (not too hot, or you’ll kill the yeast!) and a teaspoon of sugar. Let it sit for about 5-10 minutes until it gets all frothy—that’s how you know it’s alive and kicking.
Once your yeast is happy, combine it with the rest of your wet ingredients: eggs, melted butter, and maybe a splash of vanilla if you’re feeling fancy. In another bowl, whisk together your dry ingredients—flour, sugar, salt, and nutmeg—and then gradually mix them into the wet stuff.
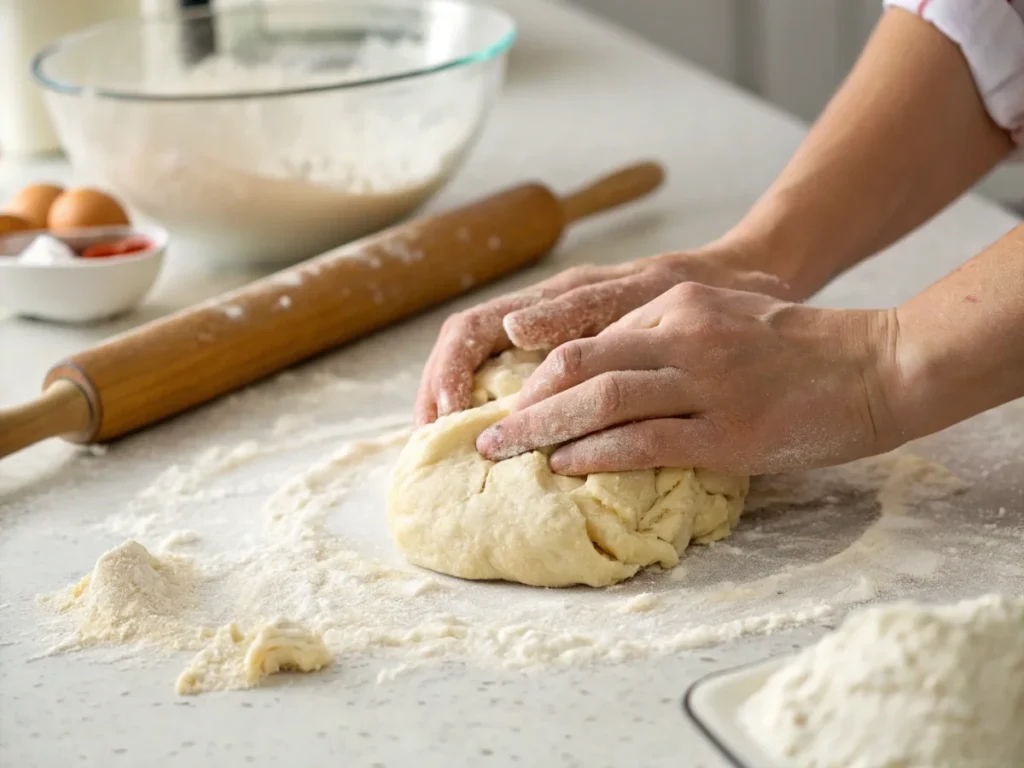
Here’s where things get fun. Knead the dough until it’s smooth and elastic. This could take anywhere from 8 to 10 minutes by hand or half that time with a stand mixer. Once it’s ready, pop it in a greased bowl, cover it with a towel, and let it rise for an hour or two. You’ll know it’s done when it doubles in size.
Tips for Frying Without Burning Your Fingers
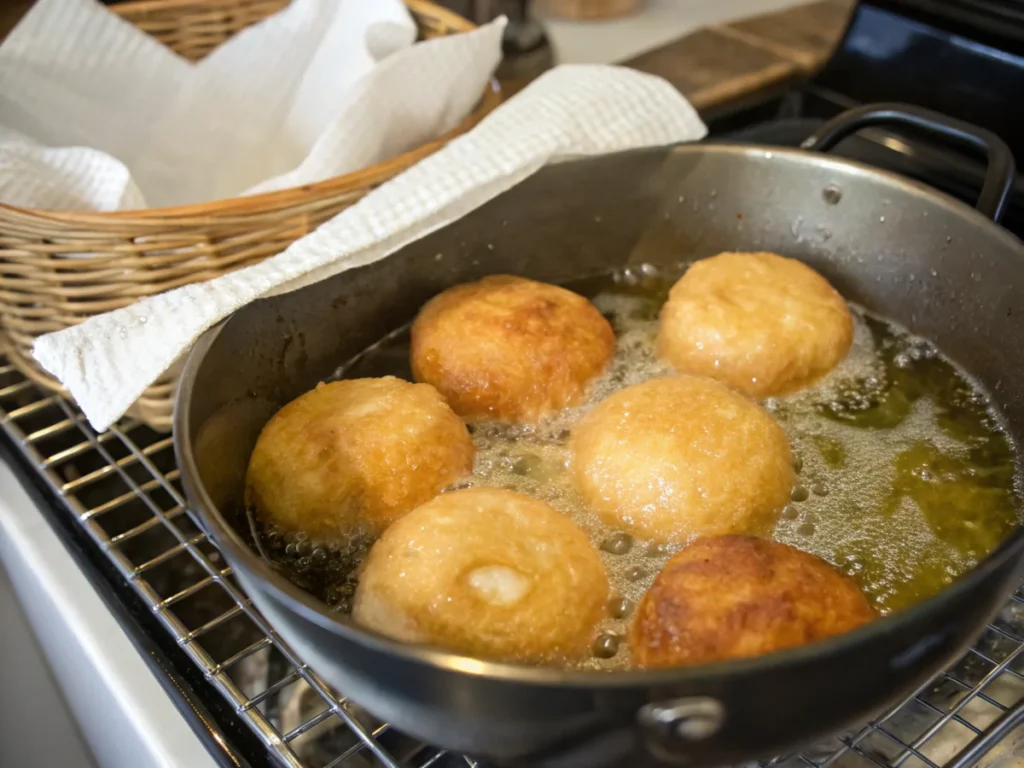
Okay, now comes the exciting part—frying! Heat up some oil in a deep pan or pot. Vegetable oil works best because it has a high smoke point. Aim for a temperature around 350°F (175°C). Too hot, and your malasadas will burn on the outside while staying raw inside. Too cool, and they’ll soak up oil like sponges. Nobody wants that!
While the oil heats up, divide your dough into small balls. Don’t worry about making them perfect; rustic charm is part of the appeal. Carefully drop each ball into the oil using a slotted spoon. Fry them for about 2-3 minutes per side until they’re golden brown and gorgeously puffed up.
Pro tip: Keep a plate lined with paper towels nearby to drain excess oil once they’re done. And remember, safety first! Use long tongs or a spoon to avoid splatters.
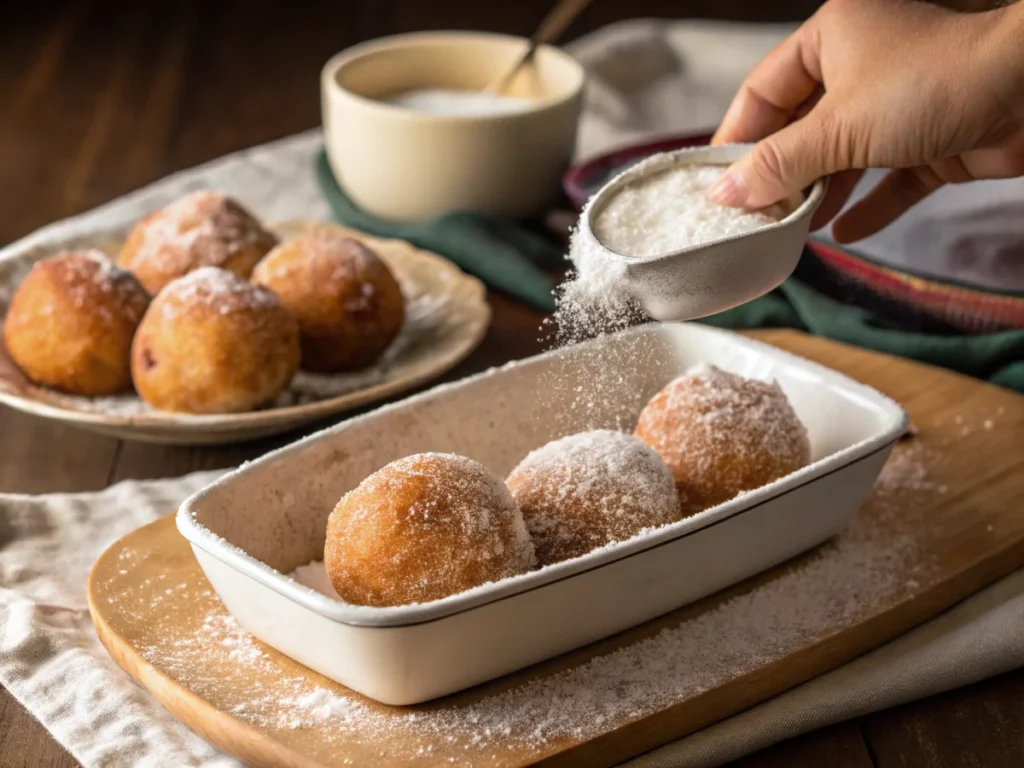
After frying, toss those warm malasadas in a bowl of sugar while they’re still hot. This ensures the sugar sticks like glue, creating that irresistible coating everyone loves.
Voilà! You’ve just nailed how to make pillowy, sugar-dusted malasadas . But wait—there’s more! In the next section, we’ll dive into mastering the art of sugar coating. Because let’s be real, nobody wants lackluster sweetness, right?
Part 4: Mastering the Sugar Coating
Choosing the Right Sugar Blend
Alright, folks, let’s talk about the pièce de résistance—the sugar coating. When it comes to how to make pillowy, sugar-dusted malasadas , the sugar isn’t just an afterthought; it’s the grand finale. The classic choice is granulated white sugar, but why stop there?
For a touch of elegance, mix in some powdered sugar for a softer, snow-like finish. Or, if you’re feeling bold, add a pinch of cinnamon or cocoa powder to the blend. Trust me, these little tweaks can turn your malasadas into a flavor-packed sensation.
One thing to keep in mind: the sugar needs to be fine enough to stick evenly. If it’s too coarse, it might clump awkwardly instead of creating that dreamy, even dusting.
Dusting Techniques for Maximum Sweetness
Now, here’s the trick to getting that perfect coat: toss the malasadas in sugar while they’re still warm. Not piping hot—just warm enough for the sugar to cling without melting into a sticky mess.
Use a large bowl or a paper bag (yes, a bag!) for easy tossing. Give them a gentle shake or roll until every inch is covered. And don’t skimp on the sugar—you want that sweet crunch with every bite!
Pro tip: If you’re making a big batch, work in smaller groups so the malasadas don’t cool down before they get their sugary hug.
With this step mastered, your malasadas are ready to shine. But hold up—we’re not done yet. Next, we’ll dive into the common pitfalls to avoid when making pillowy, sugar-dusted malasadas . Because nobody wants soggy dough or burnt edges, right?
Part 5: Common Mistakes to Avoid When Making Malasadas
Don’t Overmix! Here’s Why It Matters
Let’s face it—making malasadas isn’t rocket science, but there are a few rookie mistakes that can ruin your batch faster than you can say “oops.” One of the biggest no-nos? Overmixing the dough.
When you overwork the dough, you risk developing too much gluten, which makes your malasadas tough instead of tender. Remember, we’re aiming for pillowy perfection here, not chewy hockey pucks. So mix just until everything comes together, and then call it a day.
How to Prevent Soggy or Greasy Results
Another common blunder? Frying at the wrong temperature. If the oil’s too cold, your malasadas will absorb grease like sponges, leaving them heavy and greasy. On the flip side, if it’s too hot, they’ll burn on the outside while staying raw inside.
To avoid this disaster, invest in a kitchen thermometer. Keep the oil steady at around 350°F (175°C), and fry in small batches to prevent overcrowding. Overcrowding lowers the oil temperature, which leads to uneven cooking.
Oh, and here’s another pro tip: drain your malasadas properly after frying. Use a slotted spoon to transfer them to a plate lined with paper towels. Let them rest for a minute or two to soak up any excess oil.
Lastly, resist the urge to skip the rising time. Under proofed dough won’t puff up nicely during frying, leaving you with dense, sad little balls instead of airy delights. Patience pays off, my friends!
By steering clear of these pitfalls, you’ll be well on your way to nailing how to make pillowy, sugar-dusted malasadas . Up next, we’ll chat about serving suggestions and pairings to take your treat game to the next level. Stay tuned!
Part 6: Serving Suggestions and Pairings
Best Drinks to Pair with Pillowy Malasadas
Alright, let’s talk about how to take your malasadas from “yum” to “OMG, this is heaven.” When it comes to serving these sugary delights, pairing them with the right drink can make all the difference.
For a classic combo, serve your pillowy, sugar-dusted malasadas alongside a steaming cup of coffee or tea. The bitterness of coffee balances out the sweetness, while a fragrant chai latte adds a cozy, spiced vibe. If you’re feeling fancy, whip up a hot chocolate—because who doesn’t love dipping doughy treats into melty chocolate?
If you’re hosting brunch or just want to impress your crew, try pairing malasadas with tropical drinks like mango smoothies or passionfruit lemonade. It’s a nod to their Hawaiian roots and gives the whole experience a vacation-like feel.
Creative Twists on Classic Malasada Recipes
Feeling adventurous? Why not stuff your malasadas with something extra special? Custard, guava jelly, or even Nutella are crowd-pleasers that add a wow factor. You can also roll them in flavored sugars, like cinnamon or coconut, for a fun twist.
And hey, if you’re throwing a party, arrange the malasadas on a platter with dipping sauces like caramel, chocolate ganache, or even dulce de leche. Your guests will think you’re a dessert wizard!
With these ideas, your malasadas won’t just be tasty—they’ll be unforgettable. But what if you have leftovers? Don’t worry; we’ve got you covered. In the next section, we’ll share quick tricks for storing and reheating those pillowy beauties.
Part 7: Storing and Reheating Leftovers
How Long Do Malasadas Stay Fresh?
Let’s be real—malasadas are best enjoyed fresh out of the fryer. But life happens, and sometimes you end up with extras. So, how do you store them without losing that magic?
First things first: malasadas don’t stay fresh forever. They’re at their peak within the first 24 hours. After that, they can start to lose their crispness and become a bit stale. To keep them tasting great, store them in an airtight container at room temperature for up to two days. Avoid the fridge—it’ll dry them out faster than you can say “sugar rush.”
Quick Tricks to Revive Day-Old Malasadas
Got day-old malasadas? No problem! Pop them in the oven at 300°F (150°C) for about 5-10 minutes to bring back some of that pillowy softness. You can also zap them in the microwave for 10-15 seconds, but be careful—too long, and they’ll turn mushy.
Pro tip: If you know you’ll have leftovers, skip the sugar coating until you’re ready to serve. This keeps the sugar from getting clumpy or melting into the dough.
With these storage hacks, you can enjoy your pillowy, sugar-dusted malasadas anytime. Next up, we’ll tackle some FAQs to answer all your burning questions about making these sweet treats. Let’s go!
Part 8: FAQs About Making Malasadas
Can I Make Malasadas Ahead of Time?
Great question! While malasadas are best served fresh, you can prep the dough ahead of time. Just let it rise once, punch it down, and store it in the fridge for up to 24 hours. When you’re ready to fry, let the dough come to room temperature, shape it into balls, and proceed as usual.
Pro tip: If you’re short on time, freeze pre-portioned dough balls on a baking sheet, then transfer them to a freezer bag. When you’re ready to fry, let them thaw in the fridge overnight and bring them to room temp before frying.
Are There Gluten-Free Options Available?
Absolutely! You can use a gluten-free flour blend designed for baking. Keep in mind that gluten-free dough might be stickier and require a bit more handling care. Add a little extra flour if needed, but don’t overdo it—you still want those pillowy, sugar-dusted malasadas to stay light and airy.
What Makes Them Different from Donuts?
Ah, the age-old debate! Unlike donuts, malasadas don’t have holes and are typically yeast-based, giving them a softer, fluffier texture. Plus, they’re rolled in sugar instead of glazed, which makes them a touch more rustic and oh-so-sweet.
Part 9: Final Thoughts on Crafting Perfect Malasadas
Bringing Joy Through Homemade Treats
There’s something truly magical about making pillowy, sugar-dusted malasadas at home. Whether you’re whipping them up for a special occasion or just because, these sweet treats have a way of bringing people together. They’re proof that happiness can be found in the simplest things—like warm dough, melted sugar, and a sprinkle of joy.
Why Practice Makes Perfect
If your first batch isn’t flawless, don’t sweat it. Baking is as much about practice as it is about passion. Each time you make malasadas, you’ll learn something new—whether it’s how to perfect the dough or nail the frying technique. Before you know it, you’ll be churning out batches like a pro.
So grab your ingredients, fire up the stove, and give it a shot. Trust me, the smiles on your loved ones’ faces will make every step worth it.
And hey, if you’re hungry for more recipes, check out our article on Easy Desserts You Can Make in Under an Hour . Happy baking, friends!